
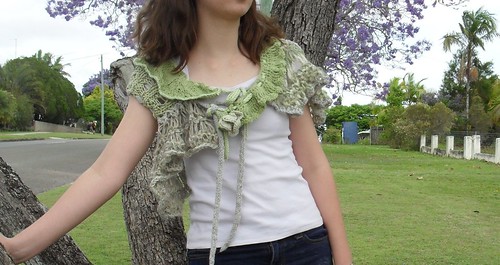
I did not construct this cape all in one sitting, the i-cord threading was driving me batty.
Here is my take on Diagram 2, attaching the top two ruffles to section 3.
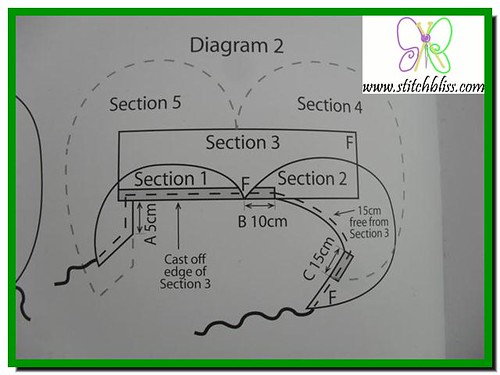

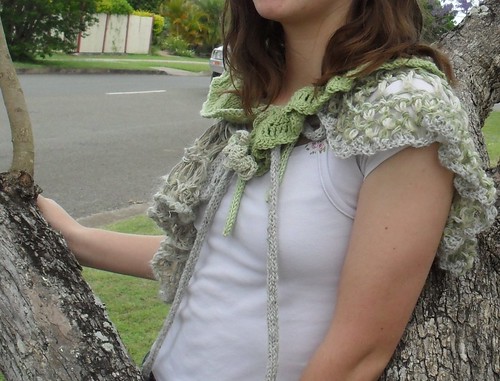
Section 1 cannot be attached directly opposite to the join of section 4 and 5, as shown in the diagram, as the length of attachment for each of section 1 and 2 does not allow this. Instead, section 1 is attached slightly to the right of the centre of the edge of section 3, then the i-cord is threaded through section 1 alone for 5cm of the cast on edge and all of the short end. There is a long tail of i cord.

Section 2 (crochet) is shown as being attached abutting section 1. I chose to overlap section 1 and 2 slightly to prevent a gap during wear. Section 2 is then attached to section 3 for 10cm, and the i cord is threaded through section 2 alone for 15cm. I assume this is to allow an armhole, but unfortunately, my daughter did not like the very skinny appearance of section 2 alone over her shoulder, and does not use this armhole. If I were to make this cape again, I would not place the armhole here, but in the section 4 attachment, to make a more symmetrical appearance when the garment is worn as a short vest, rather than just over the shoulders.
Section 2 is attached to section 4 for the last 15cm of section 2 edge. The remaining part of section 2 has the i-cord threaded through without attachment, and there is a long tail of i cord, which is worn tied to the i-cord tail from section 3 and 5.
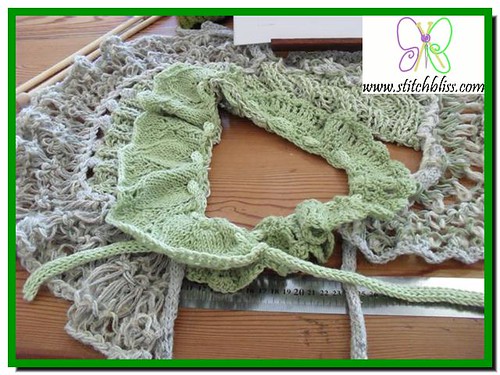
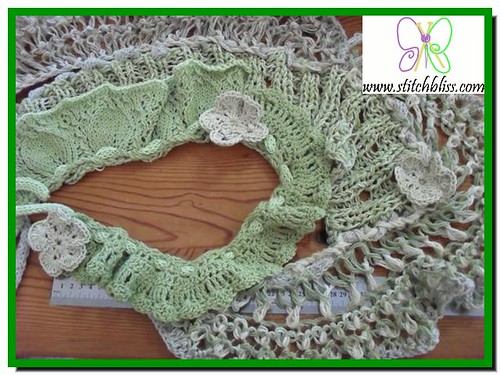
The flowers are added at this point.
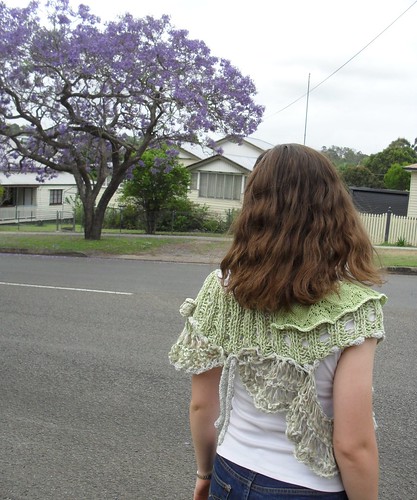
The instructions for this pattern say that assembly requires patience. I agree, but the outcome looks rather pretty, and the recipient is suitably appreciative.
No comments:
Post a Comment